
Image Defacing
This is a common procedure required to fully anonymize an MR brain image. This procedure masks out the face in an MRI making it impossible to “recognize” the subject (if the image is volume rendered or the face surface is extracted). Our implementation derives from the OpenfMRI Project. We use some data from their source code as well.
Note: If you need help with the basics of BioImage Suite Web’s viewers, please see the intro to viewers.
The following short video illustrates the process:
Method 1 — Simple Version
This is a a fully automated process:
A. Open the orthogonal viewer tool in BioImage Suite Web.
B. Under File menu select the Load Image option and then load the image you would like to deface. Alternatively, drag and drop your file into the viewer
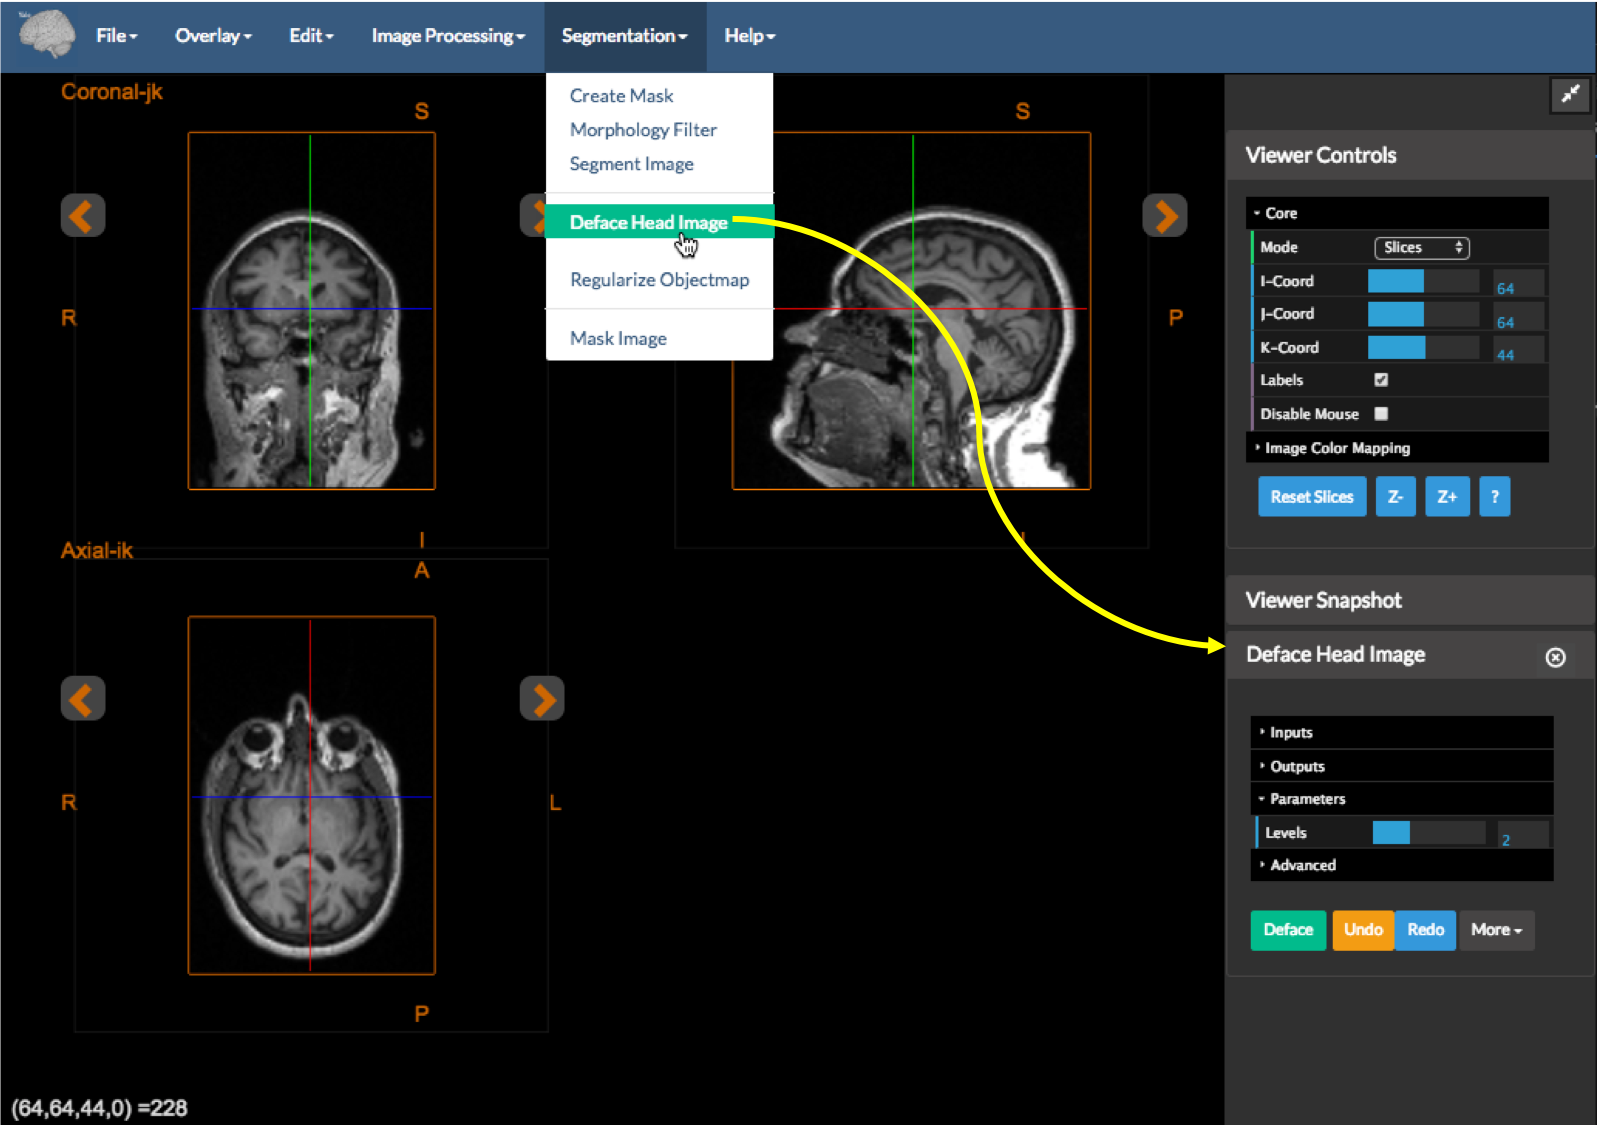 Figure 1: A raw, identifiable MRI and the
 Deface Head Image tool in the menu and sidebar.
C. Under the Segmentation menu, select Deface Head Image. This will open the Deface Head Image Tool and place it in the sidebar as in Figure 1.
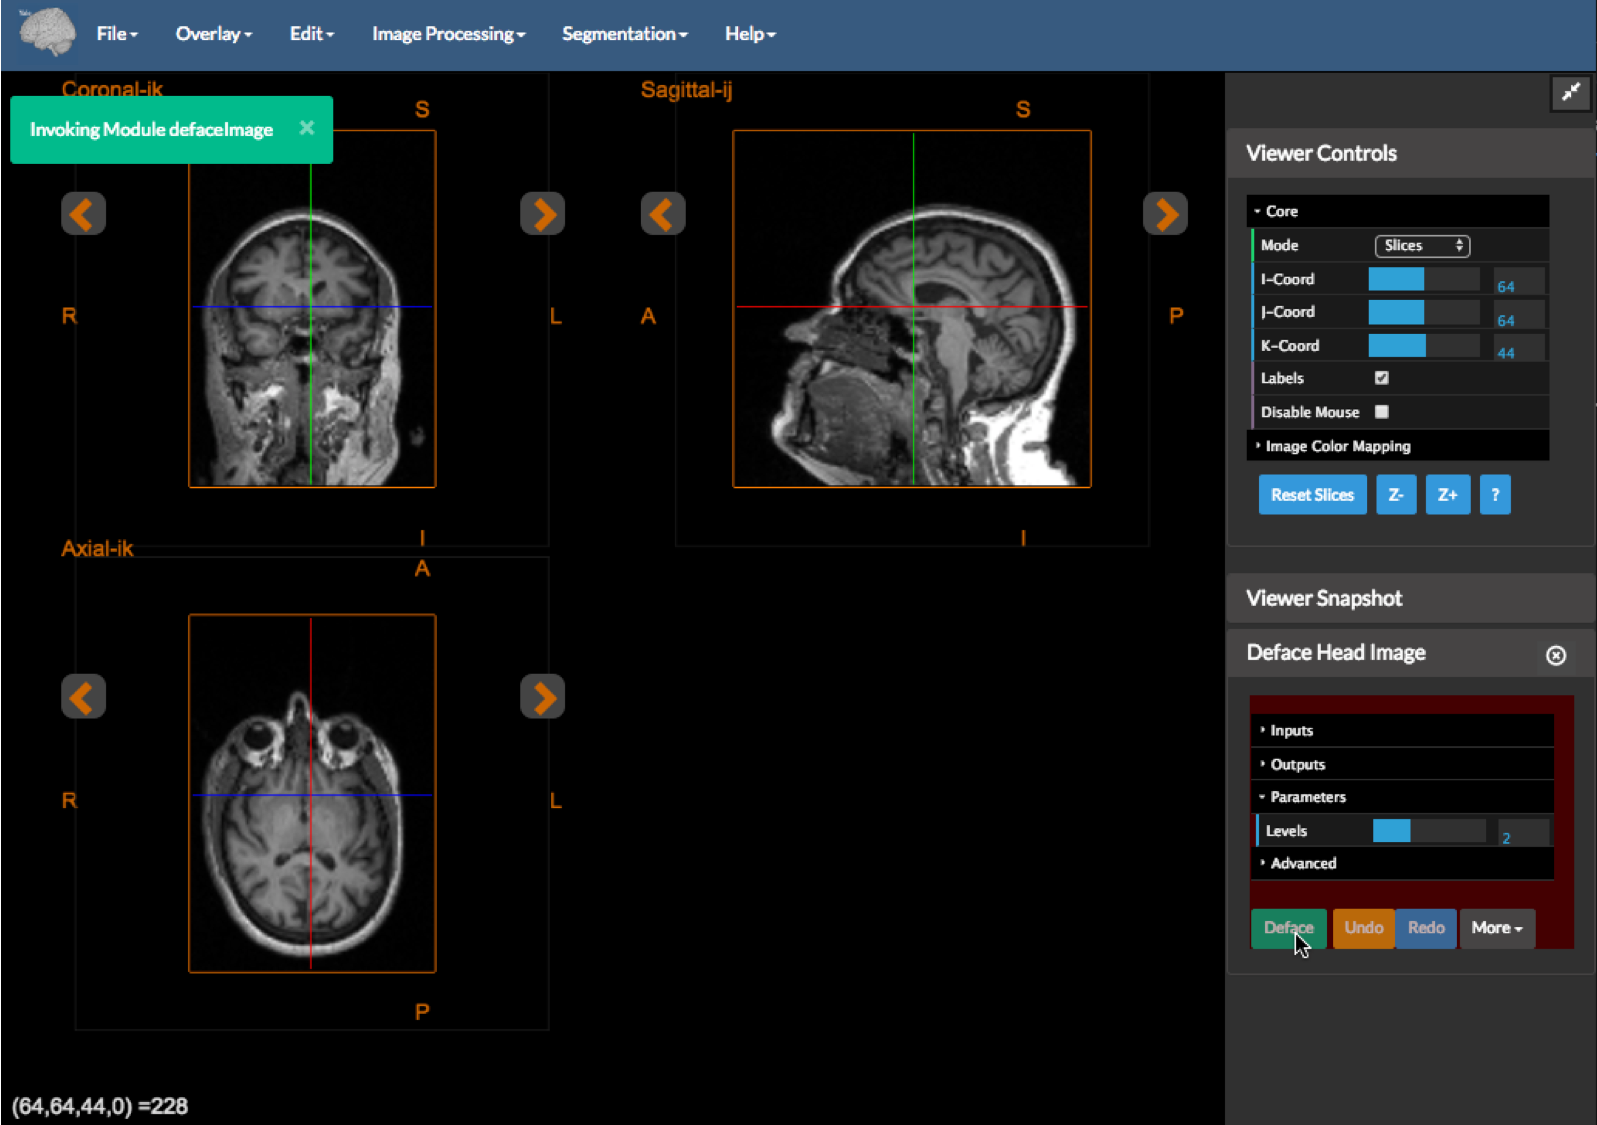 Figure 2: The image during the defacing process. This may take a moment!
D. Press the “Deface” button (in Green) — this is under the mouse cursor in the image above
E. Wait. This might take a minute or so depending on the speed of your computer. Please note that all processing is done locally. No data is ever uploaded to any of our servers.
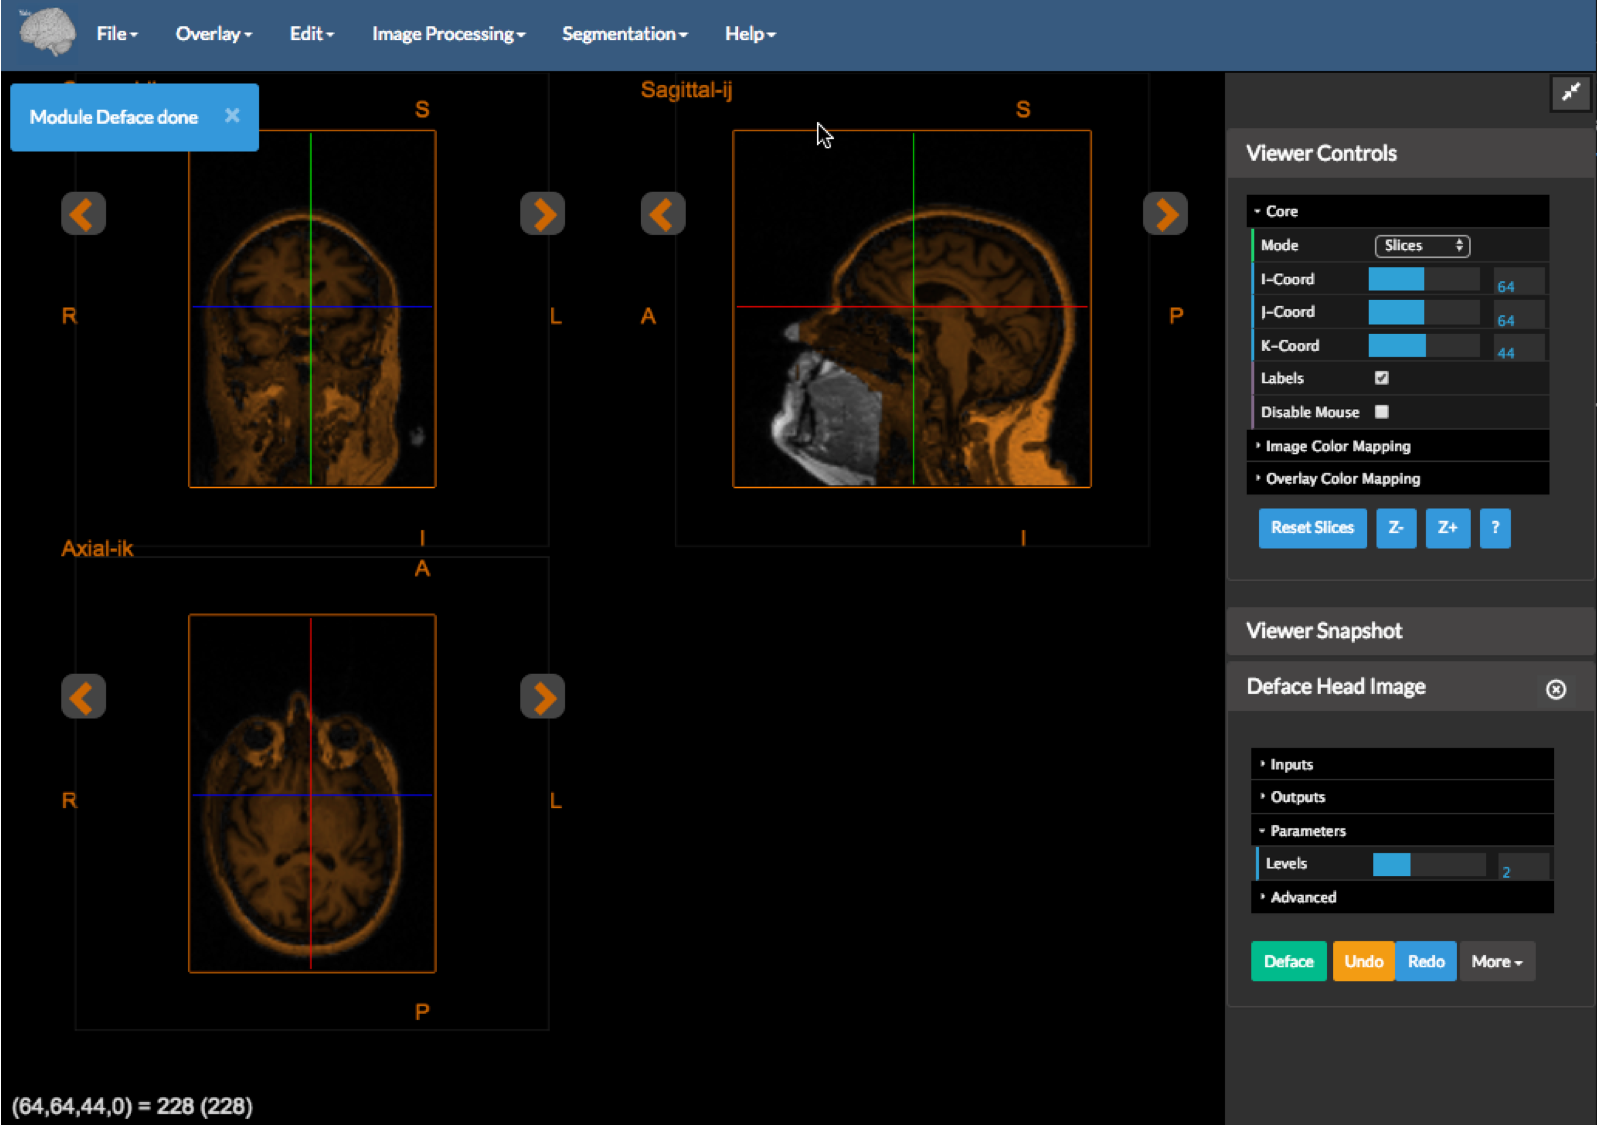 Figure 3: The defaced image. The anonymized image should be the area of the image tinted brown.
F. Once the defacing process is completed, the result will be overlaid on the original using a brownish colormap. You can see that in the sagital view above the overlay is missing the face region, indicating that defacing was successful.
G. To save the result, save the overlay image using the Overlay -> Save Overlay.
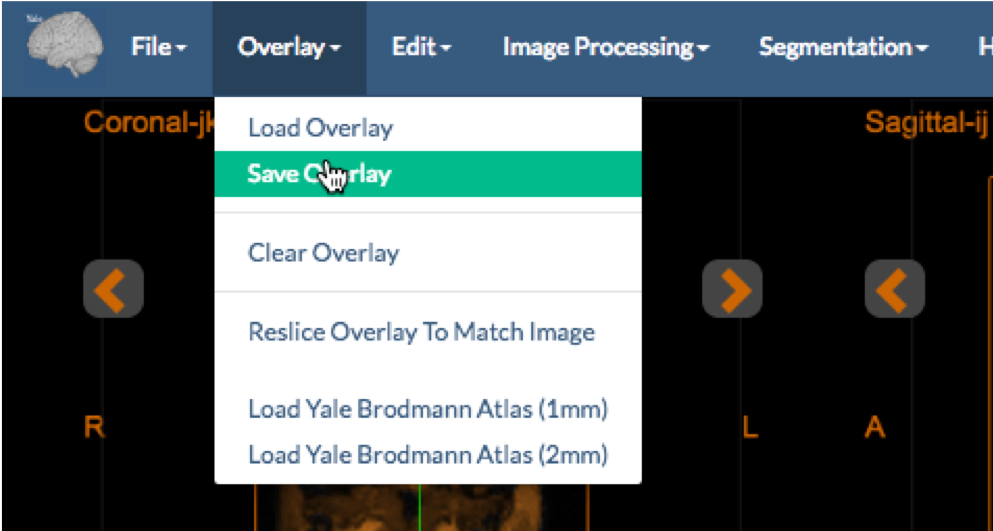 Figure 4: Saving the overlay.
___
Figure 4: Saving the overlay.
___
Method 2 — The more Complicated Version with Editing
This is a version of the method above that allows for manual editing and masking.
Repeat steps A-E as above, but use the Image Editor tool instead. The only difference is that the Deface Head Image option is located under the Tools menu.
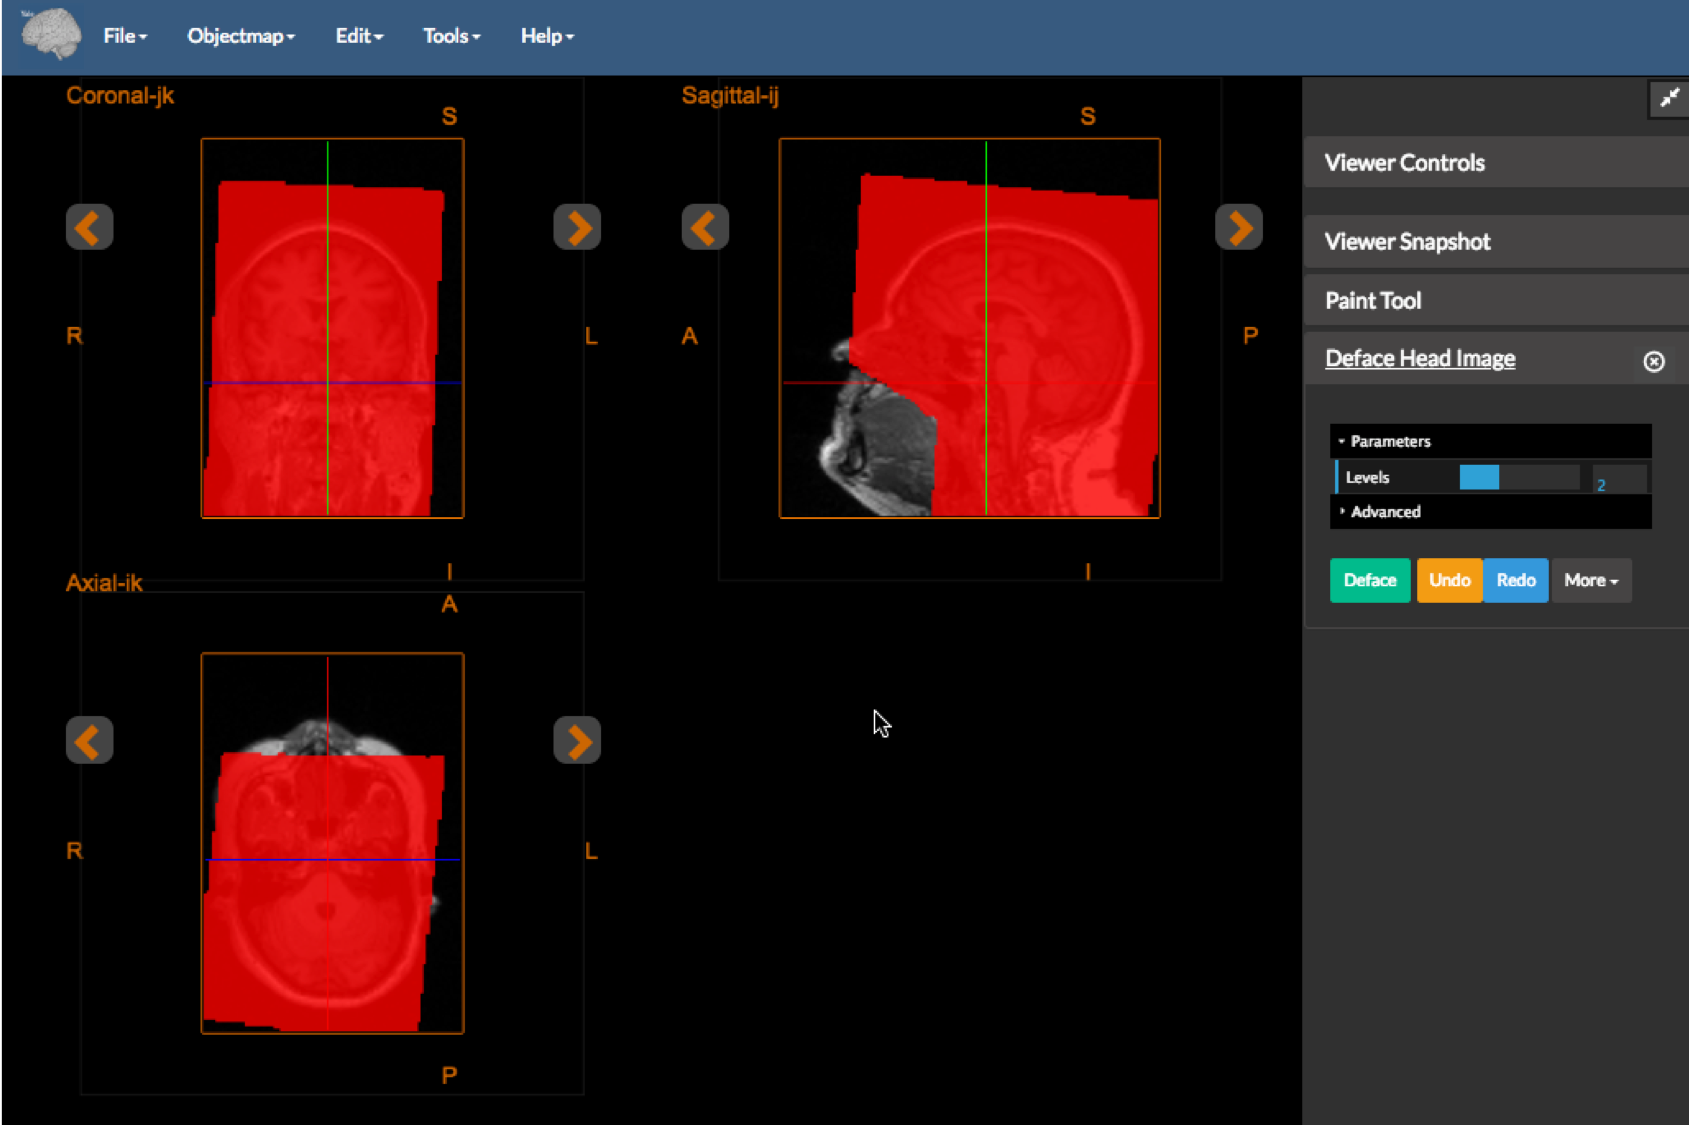 Figure 5: The defacing tool running in the editor.
Once the defacing process is completed you will get an editable mask shown in red in the figure above. This can be edited using the Paint Tool (see its description for more details).
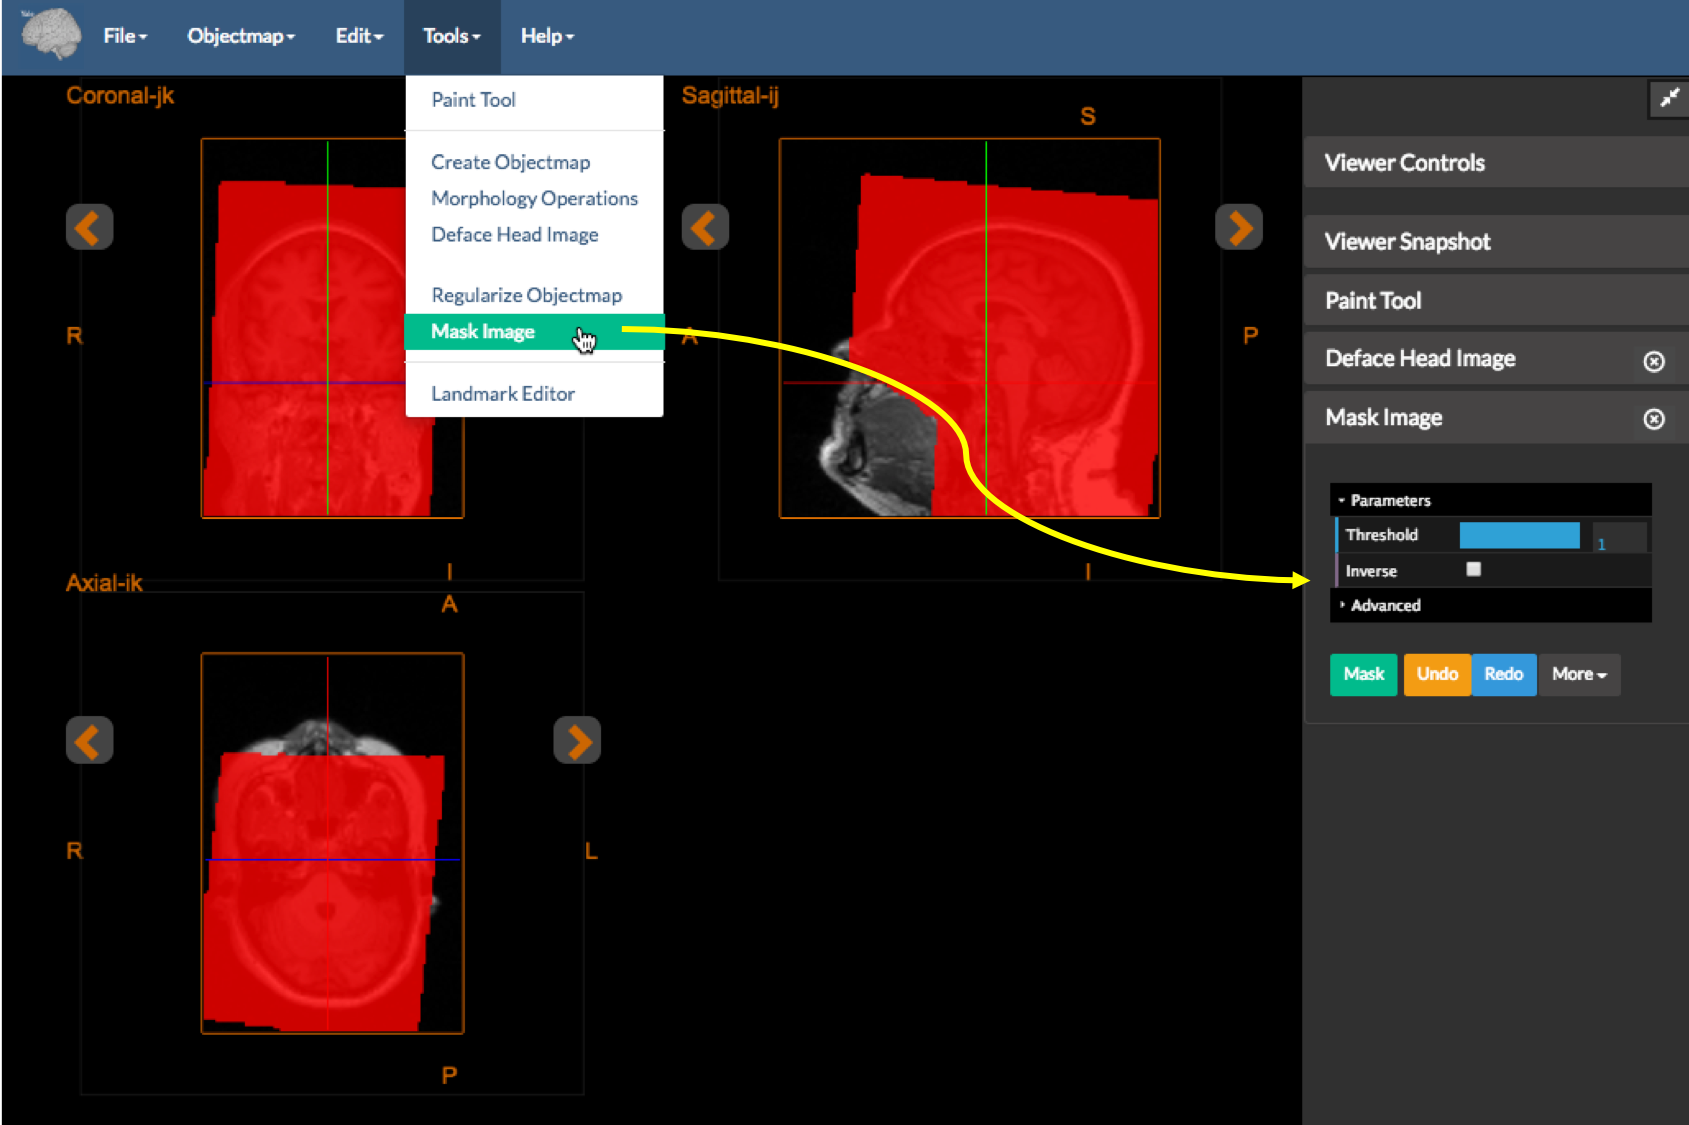 Figure 6: Where to find the masking tool in the editor.
Once you are happy with the edited mask you may create the defaced image using the Mask Image tool. Press the green Mask button to initiate the process.
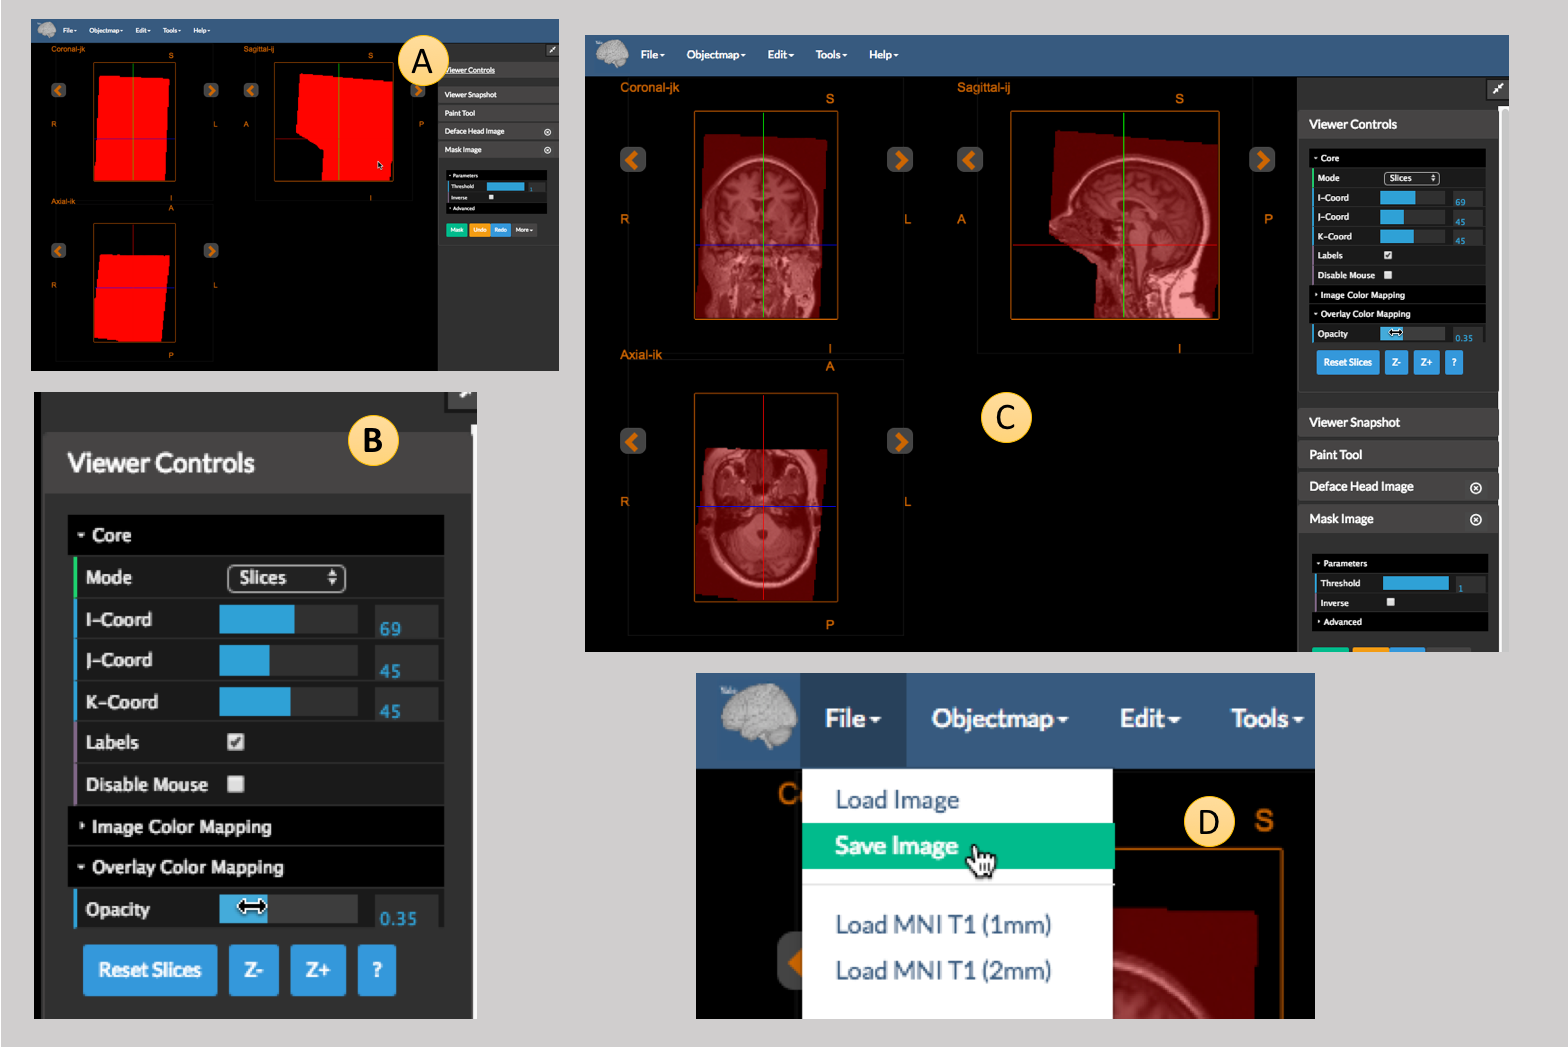 Figure 7: The mask (A), viewer controls which will let you control the opacity of the mask (B), the underlay displayed under the mask (C), and where to find the
 Save Image option (D).
When the masking is done you may see something like the view shown in (A) of Figure 7, which may not be what you expect. This is because the mask is completely opaque and hides the image — you can show the underlay by adjusting the Opacity to something smaller than 1 in the Viewer Controls (B). This should produce something that looks more like the defaced image in (C). You may save this image the same way you would with any image in BioImage Suite (D).
[BioImage Suite Web Manual Table Of Contents] [BioImage Suite Web Main Page]
This page is part of BioImage Suite Web. We gratefully acknowledge support from the NIH Brain Initiative under grant R24 MH114805 (Papademetris X. and Scheinost D. PIs, Dept. of Radiology and Biomedical Imaging, Yale School of Medicine.)